
WordPress has long been a powerhouse in the world of web development, and with the introduction of Gutenberg, it has taken a significant leap forward.
The Gutenberg editor, with its block-based approach, has revolutionized how we create and manage content.
However, the true power of Gutenberg lies in it’s extensibility through custom blocks. By creating custom Gutenberg blocks, you can tailor your WordPress site to meet your unique needs and unlock its full potential. In this blog post, we’ll explore the benefits of custom Gutenberg blocks and guide you through the process of creating your own.
Why Custom Gutenberg Blocks?
1. Tailored Content Creation
Custom Gutenberg blocks allow you to design and implement unique content elements tailored to your specific needs.
Whether it’s a complex call-to-action, a dynamic pricing table, or a bespoke testimonial carousel, custom blocks empower you to create engaging and interactive content that resonates with your audience.
This customization ensures that your website stands out and delivers a user experience that aligns perfectly with your brand’s identity and goals.
2. Enhanced Workflow Efficiency
By utilizing custom Gutenberg blocks, you can streamline your content creation process. These blocks provide a consistent, reusable set of components that can be easily added, configured, and modified.
This not only speeds up the development process but also reduces the need for repetitive coding tasks.
For content creators and developers alike, custom blocks simplify the workflow, making it easier to maintain and update the website without compromising on quality or design.
3. Improved Site Performance and SEO
Custom Gutenberg blocks are optimized for performance, ensuring that your site remains fast and responsive.
Since these blocks are built specifically for your website’s needs, they avoid the bloat that often comes with using generic plugins or third-party solutions.
Moreover, well-coded custom blocks contribute to better SEO practices by ensuring clean, semantic HTML output, faster loading times, and improved accessibility. This optimization helps your site rank higher in search engine results, driving more organic traffic and enhancing user satisfaction.
Unlock the full potential of your WordPress site with custom Gutenberg blocks and experience the benefits of tailored content creation, enhanced workflow efficiency, and improved site performance and SEO.
Getting Started with Custom Gutenberg Blocks
Creating custom Gutenberg blocks may seem daunting at first, but with the right tools and a bit of patience, you can master the process. Here’s a step-by-step guide to help you get started:
Step 1: Set Up Your Development Environment
Before you begin, ensure you have a suitable development environment. You’ll need:
- A local WordPress installation
- Node.js and npm installed
- A code editor like Visual Studio Code
Step 2: Install the Necessary Tools
Use the @wordpress/create-block package to set up your block development environment quickly. Open your terminal and run:
npx @wordpress/create-block my-custom-block. This command will scaffold a new block plugin in your WordPress installation.
Step 3: Define Your Block
Navigate to your block directory and open the src/index.js file. Here, you’ll define the block’s attributes, edit function, and save function. For example, let’s create a simple custom block that displays a message:
import { registerBlockType } from '@wordpress/blocks';

import { RichText } from '@wordpress/block-editor';

registerBlockType('my-plugin/custom-block', {

    title: 'custom block',

    icon: 'smiley',

    category: 'widgets',

    attributes: {

        content: {

            type: 'string',

            source: 'html',

            selector: 'p',

        },

    },

    edit({ attributes, setAttributes }) {

        return (

            <RichText

                tagName="p"

                value={attributes.content}

                onChange={(content) => setAttributes({ content })}

                placeholder="Enter your message..."

            />

        );

    },

    save({ attributes }) {

        return <RichText.Content tagName="p" value={attributes.content} />;

    },

});
Step 4: Build and Test Your Block
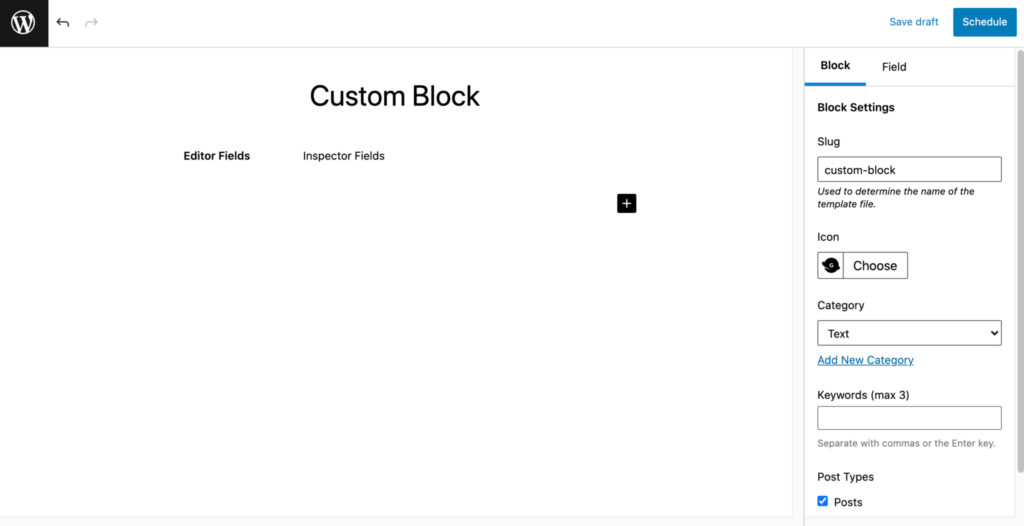
After defining your block, build it using the following command: npm run build, activate your plugin from the WordPress admin panel and test your new block in the Gutenberg editor.
Here is an example of a custom block:
Advanced Custom Block Features
Once you’re comfortable with the basics, you can start exploring more advanced features:
- Inner Blocks: Create complex layouts by nesting blocks within blocks.
- Inspector Controls: Add custom settings panels to your blocks.
- Dynamic Blocks: Render content on the server-side for more dynamic functionality.
Conclusion
Custom Gutenberg blocks are a powerful way to enhance your WordPress site.
They offer endless possibilities for functionality, design consistency, and improved workflows.
By investing a little time in learning how to create custom blocks, you can unlock the full potential of WordPress and build a site that truly meets your needs.
Whether you’re a developer looking to extend your site’s capabilities or a content creator seeking more control over your layout, custom Gutenberg blocks are a valuable tool in your WordPress arsenal.
So, dive in, experiment, and see what you can create.
Your perfect WordPress site is just a few custom blocks away!
